Basic Vector Configuration Tutorial
This tutorial will show you how to interact with the different tools in a Carmenta Engine installation to create map configuration files. The result of this exercise should be comparable to the two pictures below.
To get the most out of this tutorial, we recommend that you read the documents Carmenta Engine Overview and How Carmenta Engine Displays a Map before you start.
Figure 1 represents a Carmenta Studio configuration file, where you decide how your geographic data should be visualized.
 |
Figure 2 shows the same configuration file in Carmenta Explorer, the map configuration viewer that is also included in the SDK.
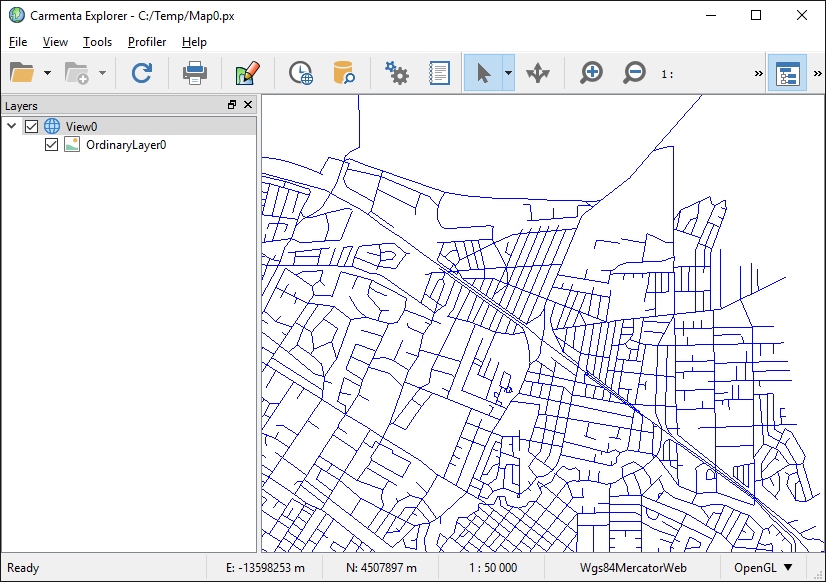 |
By following the steps in this section you will be able to create a simple configuration and view the resulting map in Carmenta Explorer.
The geographic data used for this example is installed by the "Carmenta Samples Geodata" package - separate from the Carmenta Engine installation.
Let's get started!
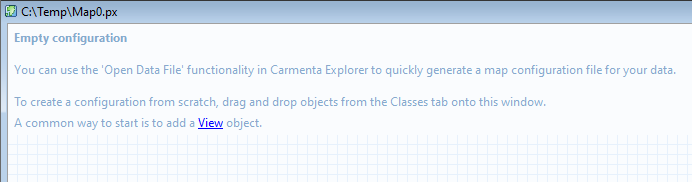
Step 1 - Starting with a new empty configuration
Start Carmenta Studio from the Start menu (you find it in the Carmenta Engine 5 SDK folder). Carmenta Studio presents an empty configuration in the dataflow window.
 |
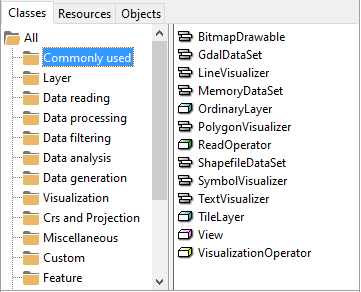
Step 2 - Adding objects to the configuration
Select the Classes tab in the left panel and select Commonly used in the tree hierarchy. This will list the most commonly used objects in the right pane of the Classes tab. From this pane, objects can be dragged and dropped onto the configuration window to be added to the map configuration.
 |
Step 3 - Creating a View
Drag a View object from the list of commonly used objects and drop it in our configuration (a View specifies the geographical area of a map).
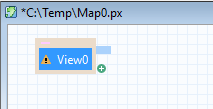 |
Note that there is a small warning triangle displayed in the View object. It indicates that a property that must be set has no value (in this case it is the drawable property). We will fix this a bit further down.
The new View is automatically selected and the settings for the new View object is displayed in the properties panel below the Classes tab.
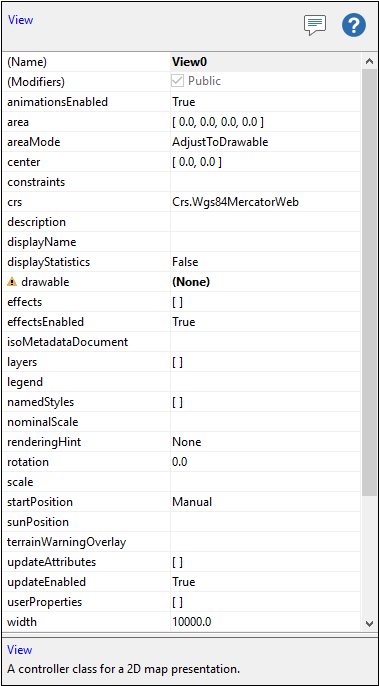 |
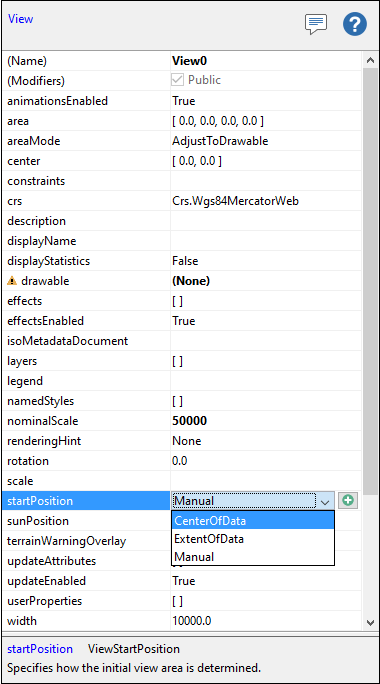
The geographical area of the View can be specified in a number of ways. In this tutorial we will set the View to automatically center itself over the geographical area of the data. To do this, in the properties panel, scroll down in the list until the startPosition property is visible and select CenterOfData as the new value. Then change the nominalScale property to 50000.
 |
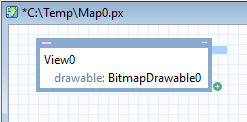
We have now configured the starting area displayed by the View but we must still configure the drawable property so that Carmenta Engine has somewhere to draw. Drag a BitmapDrawable from the list of commonly used objects and drop it on the View in our configuration.
 |
Step 4 - Adding a layer
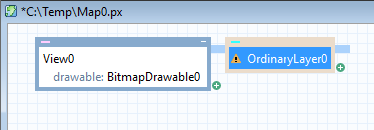
Drag an OrdinaryLayer from the list of commonly used objects and drop it on the View. In this tutorial we will only use one Layer but more Layer objects could be added to control which map features that are drawn over others (e.g. roads drawn over terrain type).
 |
Step 5 - Adding visualization
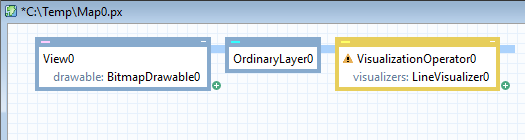
Features are drawn using visualizers but before we can add a visualizer to the configuration we add a VisualizationOperator, also found in the list of commonly used objects. Connect the VisualizationOperator to the OrdinaryLayer the same way that the OrdinaryLayer was connected to the View. Then drag a LineVisualizer and drop it on top of the VisualizationOperator and select visualizers from the menu that appears.
 |
Step 6 - Adding data
To add data to the configuration, drag and drop a ReadOperator, found in the list of commonly used objects, on the VisualizationOperator. Then drag a ShapefileDataSet from the list of commonly used objects and drop it on the ReadOperator.
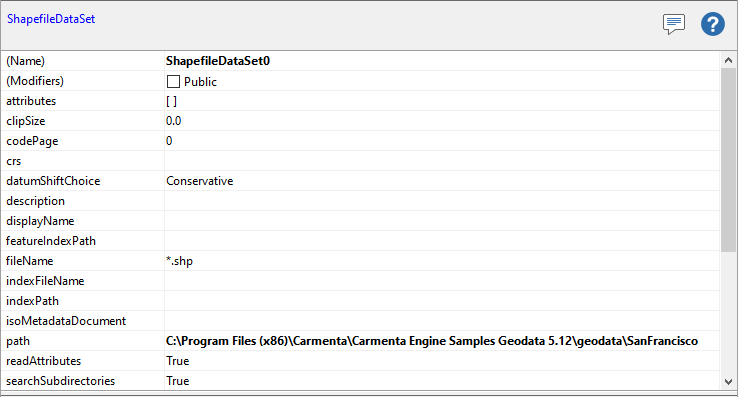
In the properties panel for the ShapefileDataSet, one would usually need to set both the path property and the fileName property to indicate what data to read. However, in this exercise we shall read the Samples Geodata SanFrancisco folder which contains only two shapefiles, for highways and for streets, and for simplicity we can let the fileName property remain *.shp so that both will be read. So we only need to set the path property. On Windows the default path for the SanFrancisco folder is C:/Program Files (x86)/Carmenta/Carmenta Engine Samples Geodata 5.15/geodata/SanFrancisco, and on Linux, the default path is /usr/share/carmenta/geodata-5.15/SanFrancisco. Since the paths appear explicitly here, you can just copy the path you need and paste it into the value field for the path property.
 |
 |
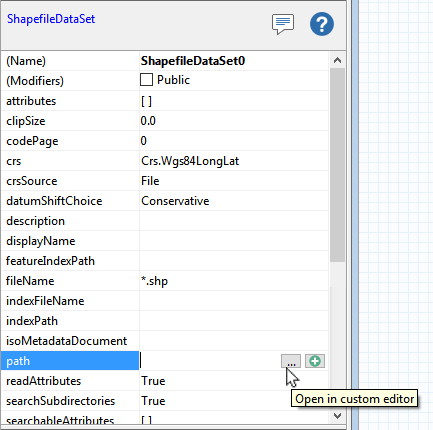
In other situations you may want to browse your file system for a path. Then you can click once in the empty value field for the path property. Two new buttons will appear in the value field: one with an ellipsis and one with a plus. In general, the ellipsis button opens a custom editor appropriate for the type of value: for a path, this will be a file system browser dialog.
 |
The plus button will open a menu of other options, depending on the type of value: you can usually create a new object of the appropriate type, or reset the value field to its default.
Step 7 - Saving the configuration file
The configuration file is ready to be viewed in Carmenta Explorer, but first it must be saved. Press Ctrl + S and save your configuration file as HelloWorld.px e.g. on the Desktop.
Step 8 - Viewing the configuration file
To preview your configuration file, press the globe icon on the toolbar or just press the F5 key. The result should be a road map of San Francisco, as shown below.
|
|
Alternative - Letting Carmenta Explorer create a configuration
This tutorial has described the nuts and bolts of making a configuration in Carmenta Studio, starting from scratch. However, a quicker way to make a configuration for the San Francisco streets would be to use Carmenta Explorer and do Open Data Directory on the streets subfolder in the SanFrancisco folder. This will automatically create and display a configuration for the streets, and the configuration will be more advanced than the one we made in the tutorial; for more details, see Carmenta Explorer User's Guide. However, even such a configuration will need manual refinement, so it is always useful to learn the nuts and bolts of Carmenta Studio.